

Car audio enthusiasts run into this problem all the time. You install an amplifier, connect the power cable, secure the ground wire, hook up the speakers, and then suddenly realize something important is missing: the remote turn-on wire. Without it, the amplifier refuses to wake up, almost like a sleeping giant waiting for a signal. That tiny blue wire may look insignificant, but it plays a major role in controlling the amplifier’s power state.
The good news is that there are several ways to turn on an amp without using the traditional remote wire. Some methods are quick and simple, while others require careful planning to avoid electrical problems or battery drain. Choosing the wrong method can leave you stranded with a dead battery or even damage expensive audio equipment. Choosing the right method, though, can give you a reliable setup that works just as smoothly as a factory installation.
Modern car amplifiers are designed to operate safely with controlled power delivery. Manufacturers expect a low-voltage trigger signal from the head unit before allowing the amp to activate. When that signal is missing, many people try unsafe shortcuts that create bigger problems later. Understanding how the system works first makes every wiring decision safer and smarter.
This guide breaks everything down in simple terms. You’ll learn why amplifiers normally need a remote signal, how to use ignition power as an alternative, how to install a manual toggle switch, and how to prevent battery drain when the car is turned off. You’ll also discover the most common wiring mistakes that destroy amplifiers and how to test your setup properly before finishing the installation.
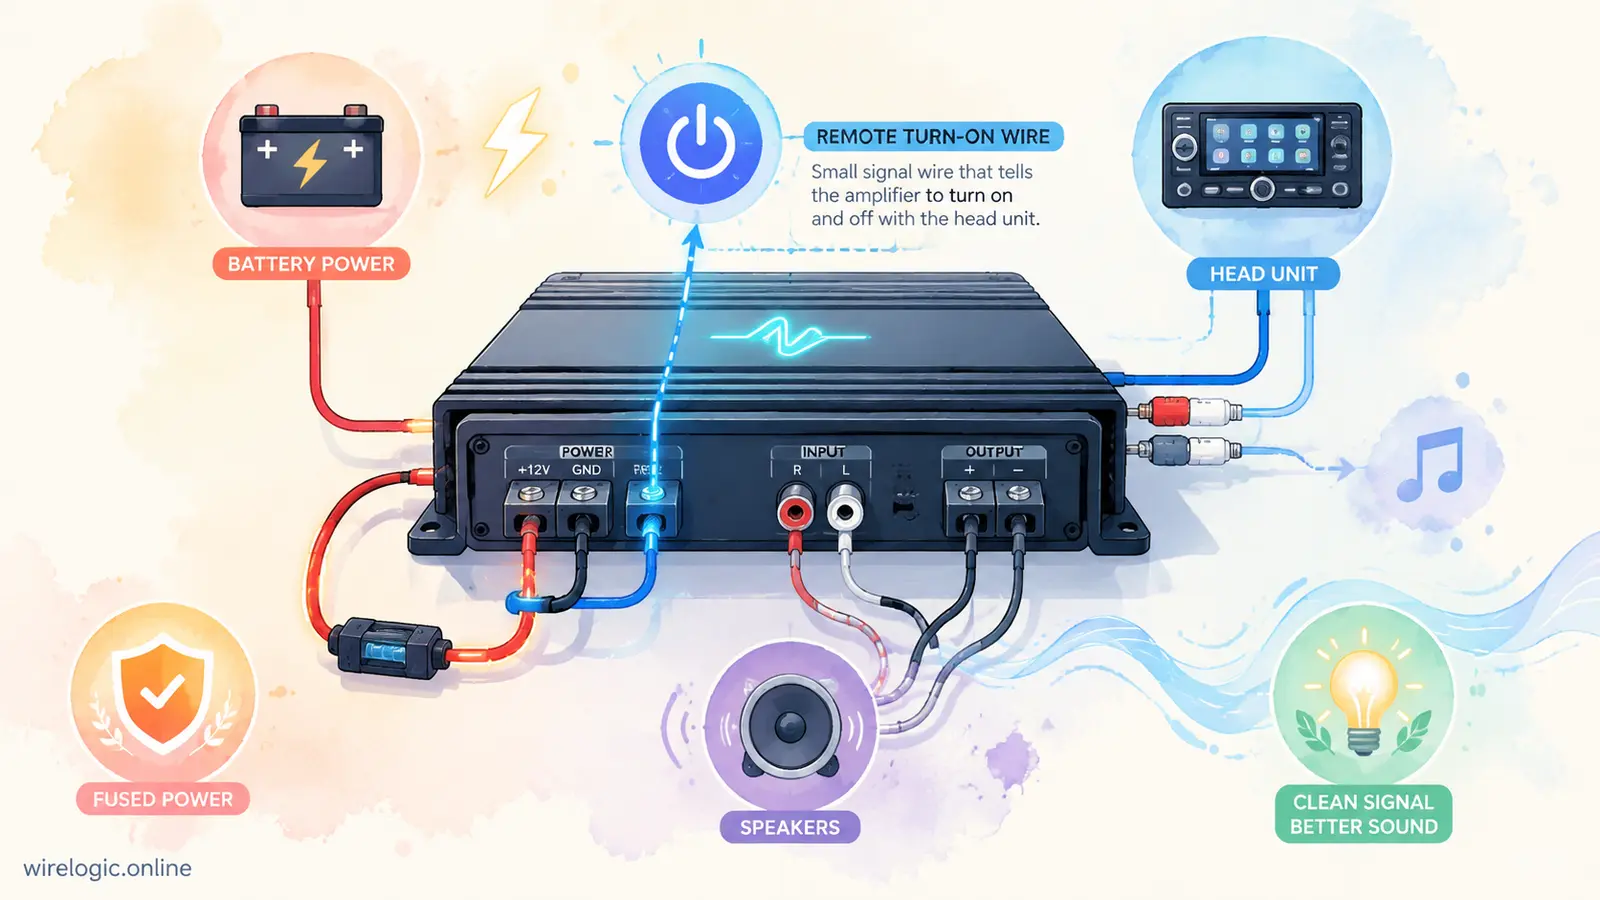
Understanding How a Car Amplifier Powers On
What the Remote Turn-On Wire Actually Does
The remote turn-on wire is basically the amplifier’s “wake-up call.” While the large power cable connected to the battery constantly carries 12 volts, the amplifier doesn’t immediately switch on when power is present. Instead, it waits for a small trigger voltage sent through the remote wire. Once the amplifier detects that signal, it activates its internal circuitry and begins operating.
Most aftermarket head units include a blue or blue-and-white wire labeled “REM,” “Remote,” or “Amp Control.” This wire outputs around 12 volts only when the stereo is powered on. The moment you turn off the radio, the signal disappears, and the amplifier shuts down automatically. It’s a simple but extremely effective control system.
Think of the remote wire like the ignition key in a car. Your battery may already have power available, but the engine doesn’t start until the ignition system receives the proper signal. Amplifiers work in much the same way. Without that signal, they stay dormant to avoid unnecessary power consumption.
This setup also protects your vehicle battery. Amplifiers can consume significant current even while idle. If the amp remained active all the time, it could slowly drain the battery overnight. That’s why manufacturers rely on remote turn-on systems rather than constant power activation.
Why Most Amplifiers Require a Remote Signal
Amplifiers require a remote signal primarily for power management and electrical safety. Car audio systems operate in an environment where stable voltage control matters. Vehicles already place heavy demands on the electrical system through headlights, ignition systems, climate control, and onboard electronics. An amplifier running constantly adds another layer of electrical load.
Many modern amplifiers also contain protection circuitry that monitors operating conditions. The remote turn-on input acts as part of this protective architecture. Without proper startup sequencing, the amp may fail to initialize correctly or may generate loud pops and voltage spikes through the speakers.
There’s also the issue of heat. Amplifiers generate heat even during standby operation. If left powered continuously, internal components remain active longer than necessary, reducing overall lifespan. Heat is one of the biggest enemies of electronic equipment, especially inside vehicles where temperatures can already become extreme.
Another reason manufacturers use remote signals involves compatibility with factory systems. Some factory stereos don’t provide standard RCA outputs, but installers can still integrate amplifiers using line output converters or signal-sensing devices. The remote trigger helps synchronize all these components so they operate together cleanly and efficiently.
Can You Turn on an Amplifier Without a Remote Wire?
Situations Where the Remote Wire Is Missing
There are several situations where people find themselves without a usable remote wire. One of the most common scenarios happens when installing an amplifier into a factory stereo system. Many stock head units simply don’t include a dedicated amplifier control wire. Instead of replacing the stereo, some people prefer keeping the factory appearance and finding alternative activation methods.
Another common situation involves older vehicles or secondhand wiring setups. Sometimes previous owners remove aftermarket stereos but leave amplifier wiring incomplete. You may discover a perfectly functional amp installation with no remote lead available anywhere in the dashboard.
Motorcycles, boats, and off-road vehicles also present unique challenges. Certain compact audio systems lack traditional head units altogether. Bluetooth receivers and portable media controllers may not include remote output terminals, forcing installers to improvise alternative solutions.
Temporary testing setups create another reason for bypassing the remote wire. When troubleshooting audio systems, installers sometimes need a quick way to power an amp without fully wiring the entire stereo system. In these cases, a temporary remote bypass can help diagnose problems quickly before permanent installation begins.
When Bypassing the Remote Wire Makes Sense
Bypassing the remote wire makes sense when done carefully and intentionally. If your stereo lacks a remote output but still provides switched ignition power, using an alternative trigger source can work perfectly well. The key is ensuring the amplifier turns off automatically when the vehicle shuts down.
In some situations, a manual toggle switch provides more control than a traditional remote lead. Off-road enthusiasts, show-car owners, and custom audio builders sometimes prefer independent amplifier control so they can disable the sound system without turning off the stereo itself.
Signal-sensing amplifiers also reduce the need for traditional remote wires. Some modern amplifiers automatically detect incoming audio signals and power themselves on accordingly. These systems simplify installation dramatically and are especially useful in factory stereo integrations.
What doesn’t make sense is permanently wiring the amp directly to constant battery power without any switching mechanism. That approach almost always leads to dead batteries, overheating, or unnecessary strain on the electrical system. A proper alternative method should always include controlled activation and shutdown behavior.
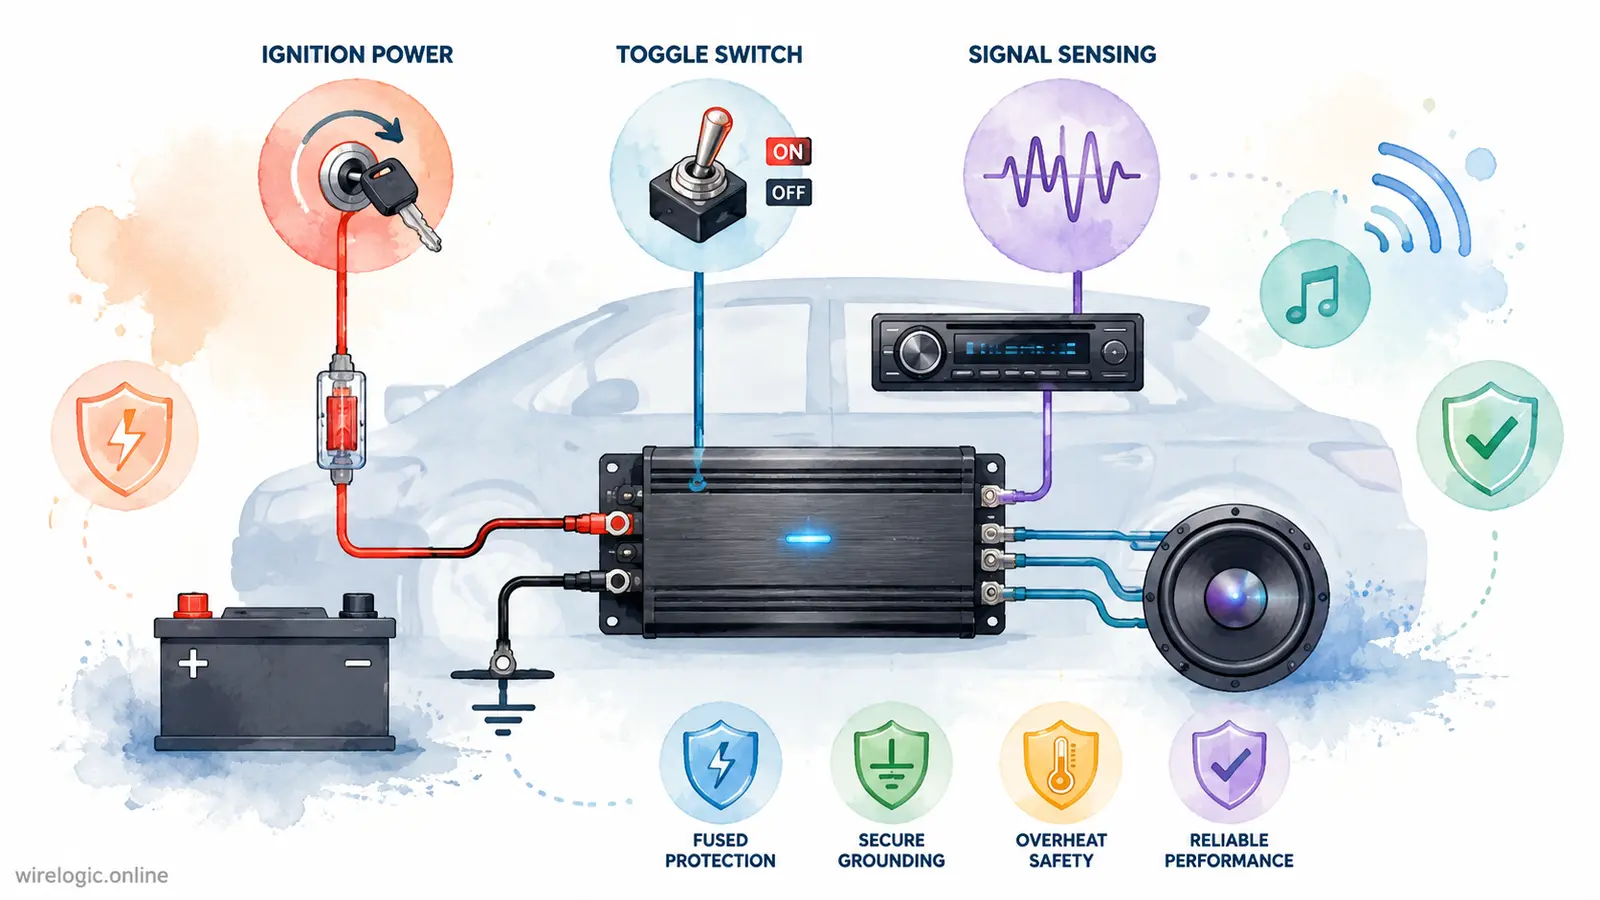
Alternative Ways to Power an Amplifier Safely
Using Ignition Power Instead of a Remote Wire
Using ignition power is one of the safest and most popular alternatives to a dedicated remote wire. Instead of relying on the stereo’s remote output, the amplifier activates whenever the ignition key enters the accessory or ON position. This method closely mimics how factory electronics behave.
The advantage here is reliability. Ignition-switched circuits already exist specifically to control devices that should only operate while the vehicle is running or partially powered. By tapping into an accessory circuit, the amplifier shuts down automatically when the vehicle turns off, preventing battery drain.
This approach works especially well for factory stereo systems lacking amplifier outputs. Since most vehicles include accessory-powered fuse slots, installers can easily identify a suitable trigger source using a multimeter or fuse tap adapter.
There’s another benefit too: simplicity. Instead of routing a long remote wire from the dashboard to the trunk, you can often find a nearby ignition-powered source much closer to the amplifier location. That reduces wiring complexity and speeds up installation.
Finding a Proper Ignition Source
Finding the right ignition source requires attention to detail. Not every fuse or wire inside the vehicle behaves the same way. Some circuits remain powered continuously, while others activate only during specific ignition positions.
A multimeter becomes your best friend here. You want a circuit that shows 0 volts when the vehicle is off and approximately 12 volts when the key enters the accessory or ON position. Common sources include:
| Component | Typical Behavior | Good for Amp Trigger? |
|---|---|---|
| Radio Fuse | Powers with ignition | Yes |
| Cigarette Lighter | Often switched | Usually |
| Power Windows | Delayed shutdown | Sometimes |
| Interior Lights | Constant or timed | No |
| ECU Circuits | Sensitive electronics | Avoid |
Choosing the wrong source can create unpredictable behavior. For example, tapping into a delayed-retained accessory circuit may leave the amp active long after the vehicle shuts down.
Connecting the Amp to Accessory Power
Once you identify the ignition source, the actual connection process is straightforward. Most installers use a fuse tap or add-a-circuit adapter to safely connect the remote input terminal on the amplifier to the switched power source.
The amplifier’s remote terminal draws very little current, usually under 0.5 amps. That means it doesn’t place major strain on the ignition circuit. Still, adding an inline fuse provides extra protection against accidental shorts.
Good wire management matters too. Secure all wiring away from moving pedals, sharp metal edges, and high-heat areas. Loose wires may eventually rub against metal surfaces and create dangerous shorts.
After installation, test the behavior carefully. The amp should power on only when the ignition activates and should shut off immediately or shortly after the key is removed.
Installing a Manual Toggle Switch
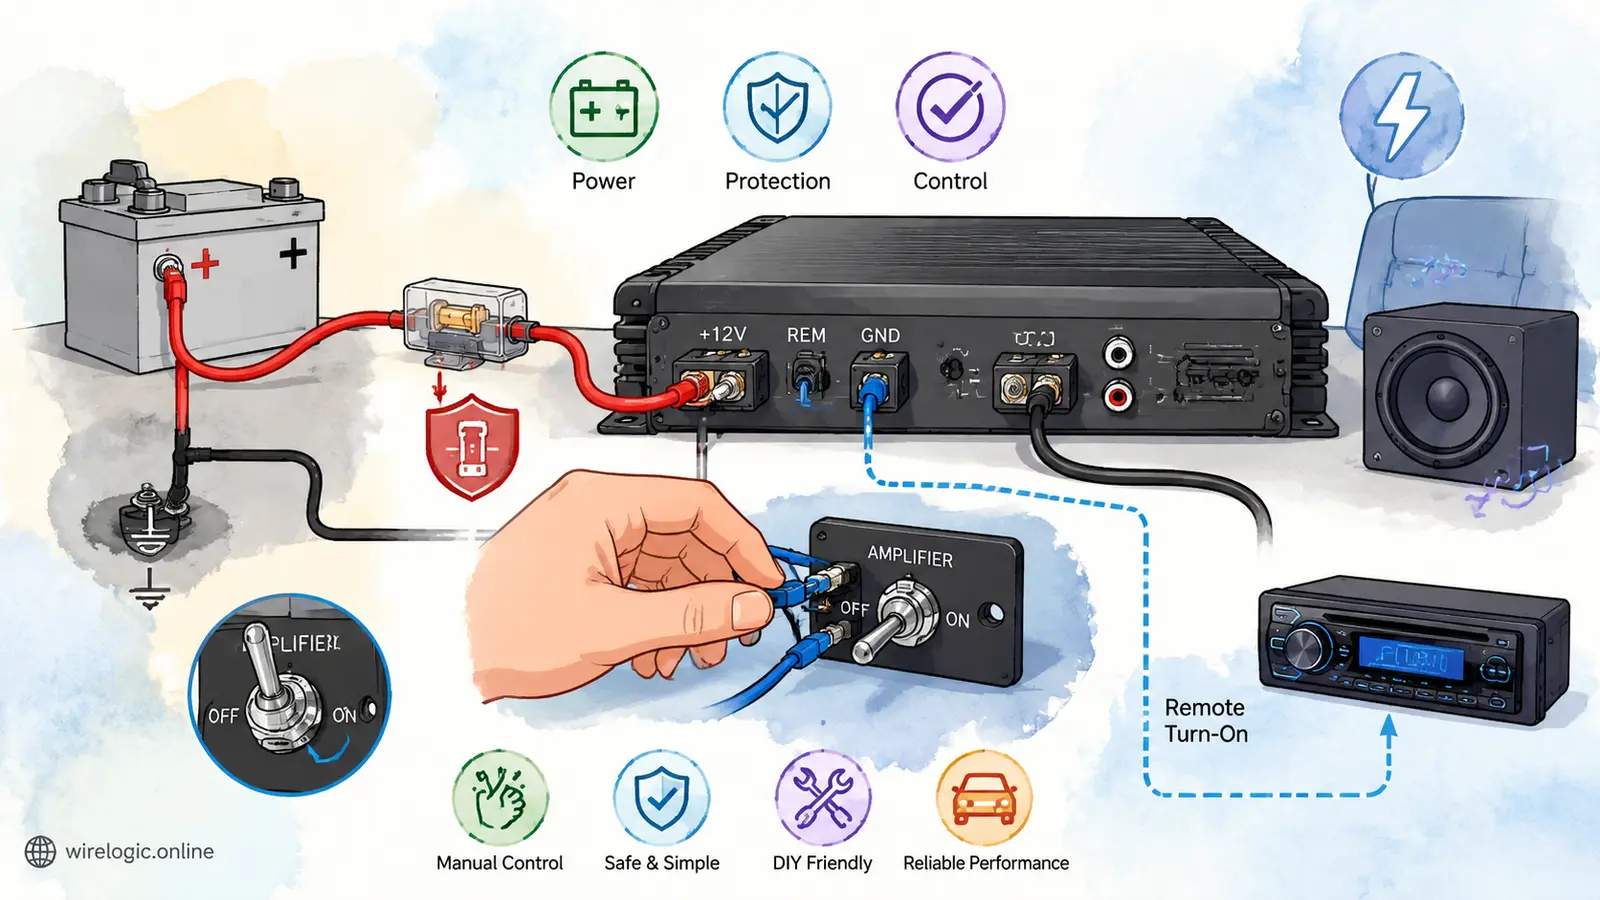
A manual toggle switch offers another practical way to turn on an amplifier without a remote wire. Instead of relying on automatic activation, the driver manually controls amplifier power whenever needed. This method is surprisingly common in custom builds and enthusiast audio systems.
The biggest advantage is flexibility. You decide exactly when the amplifier receives power. Want to disable the subwoofer during long highway trips? Flip the switch. Need to preserve battery life during camping or tailgating? Turn the amp off instantly.
This setup also works well in older vehicles where finding reliable switched circuits may be difficult. Rather than hunting through aging wiring harnesses, you create a completely independent control system.
Still, responsibility shifts to the driver. Forgetting to switch the amp off can easily drain the battery overnight. That’s why many installers prefer illuminated switches or hidden reminder indicators.
Benefits of Using a Toggle Switch
A toggle switch system offers several advantages beyond simple on/off control. It creates a direct physical disconnect between the amplifier and trigger signal, reducing accidental activation risks.
Custom audio enthusiasts often appreciate the simplicity. There’s no dependency on stereo outputs, factory wiring compatibility, or complex signal processors. A basic switch circuit is easy to troubleshoot and inexpensive to install.
Another benefit involves diagnostics. If audio problems occur, you can isolate amplifier behavior instantly by toggling the switch manually. That simplifies troubleshooting significantly during repairs or upgrades.
Toggle switches also allow multiple amplifier configurations. Some advanced installations use separate switches for subwoofer amps, speaker amps, or auxiliary accessories. This modular approach creates greater control over power consumption and sound system behavior.
Step-by-Step Switch Installation
Installing a toggle switch begins with selecting a suitable mounting location. Many people place switches beneath the dashboard, inside center consoles, or near accessory panels for easy access.
The basic process includes:
- Run a fused 12V wire from an ignition or battery source
- Connect the wire to one side of the switch
- Connect the opposite side of the switch to the amplifier remote terminal
- Ground any illuminated switch if required
- Test operation before securing panels
Using quality components matters here. Cheap switches may fail over time due to vibration, heat, or corrosion. Automotive-grade switches designed for vehicle environments provide better long-term reliability.
Neat wiring is equally important. Professional-looking installations reduce future troubleshooting headaches and improve overall safety.
Risks of Wiring the Amp Directly to Constant Power
Why Battery Drain Happens
Connecting the amplifier remote terminal directly to constant battery power might seem like the easiest solution, but it creates serious problems. The amplifier remains active continuously, even when the vehicle is parked and turned off.
Many people underestimate how much standby current an amplifier consumes. Larger amplifiers with advanced circuitry can drain batteries surprisingly fast. A vehicle sitting overnight with the amp active may struggle to start the next morning.
Battery drain becomes even worse during cold weather. Car batteries already lose efficiency in low temperatures, and continuous amplifier load accelerates voltage loss further. What starts as a minor inconvenience can eventually shorten battery lifespan permanently.
Parasitic drain issues also affect alternator performance. Constantly depleted batteries force the charging system to work harder during every drive cycle. Over time, this added stress may contribute to premature alternator wear.
Potential Damage to the Amplifier
Continuous power exposure doesn’t just threaten the battery. It can also reduce amplifier lifespan dramatically. Internal components remain energized constantly, generating heat and electrical stress even when no music is playing.
Capacitors, transistors, and voltage regulators degrade faster under continuous operating conditions. Vehicle interiors experience major temperature swings, especially during summer. Heat buildup combined with nonstop power accelerates component aging.
There’s also increased risk of accidental short circuits. A permanently active amplifier remains vulnerable anytime wiring insulation becomes damaged. Since power never shuts off automatically, even minor wiring issues can escalate into major electrical failures.
Some amplifiers include thermal protection systems, but relying on those protections constantly isn’t ideal. Protective shutdown mechanisms are emergency safeguards, not normal operating modes.
Preventing Battery Drain When the Vehicle Is Off
Smart Wiring Practices
Preventing battery drain starts with thoughtful wiring design. Every amplifier installation should include a clear power management strategy that ensures automatic shutdown whenever the vehicle powers off.
Using switched ignition sources remains one of the best approaches because it mirrors factory electrical behavior. Relays add another layer of control by allowing low-current trigger circuits to safely control higher-current accessories.
Wire quality also matters more than many beginners realize. Undersized or poorly insulated wires increase resistance, generate excess heat, and create unstable voltage conditions. Investing in proper automotive-grade wiring helps maintain long-term reliability.
Grounding deserves equal attention. Poor grounds create voltage fluctuations that may cause amplifiers to behave unpredictably. Always use clean, paint-free chassis grounding points with secure metal-to-metal contact.
Using Relays and Fuse Protection
Relays provide professional-level control for amplifier activation circuits. Instead of sending ignition power directly to the amp, the ignition source activates a relay, which then controls amplifier startup safely and efficiently.
This setup reduces electrical strain on factory circuits while improving reliability. Relays also help isolate sensitive electronics from aftermarket modifications, lowering the risk of interference or voltage spikes.
Fuse protection is absolutely essential. Every power wire connected to the battery should include a properly sized fuse located close to the battery terminal. Without it, wiring shorts can create dangerous overheating conditions.
Here’s a simple comparison of protection methods:
| Protection Method | Purpose | Recommended |
|---|---|---|
| Inline Fuse | Prevents wiring fires | Yes |
| Relay | Controls high-current circuits | Yes |
| Circuit Breaker | Reusable protection | Optional |
| Direct Unfused Wire | Dangerous overload risk | No |
Professional installers treat fuse placement as non-negotiable because electrical fires inside vehicles spread rapidly and can destroy entire systems within minutes.
Common Wiring Mistakes That Damage Amplifiers
Incorrect Grounding Problems
Bad grounding is one of the biggest amplifier killers in car audio systems. Even expensive amplifiers perform poorly when grounding quality is weak or inconsistent.
A proper ground should connect to bare chassis metal using a short, thick cable. Many beginners mistakenly attach grounds to painted surfaces, seat bolts, or thin sheet metal that cannot handle stable current flow.
Poor grounding often creates symptoms like:
- Engine whining noises through speakers
- Amplifier overheating
- Random shutdowns
- Weak bass performance
- Protection mode activation
Ground loop problems also emerge when multiple devices use inconsistent grounding locations. Keeping grounding points short and centralized reduces electrical noise significantly.
Fuse and Wire Gauge Errors
Using the wrong wire gauge creates another major issue. Amplifiers demand substantial current, especially high-power subwoofer systems. Thin wires create resistance that limits performance and generates dangerous heat buildup.
Here’s a quick reference:
| Amplifier Power | Recommended Wire Gauge |
|---|---|
| Up to 400W | 8 AWG |
| 400W–1000W | 4 AWG |
| Over 1000W | 1/0 AWG |
Fuse sizing mistakes can be equally dangerous. Oversized fuses fail to protect wiring properly during faults, while undersized fuses cause nuisance blowing during heavy bass peaks.
Quality copper wiring and properly matched fuses protect both safety and sound quality. Skimping on wiring materials often leads to expensive repairs later.
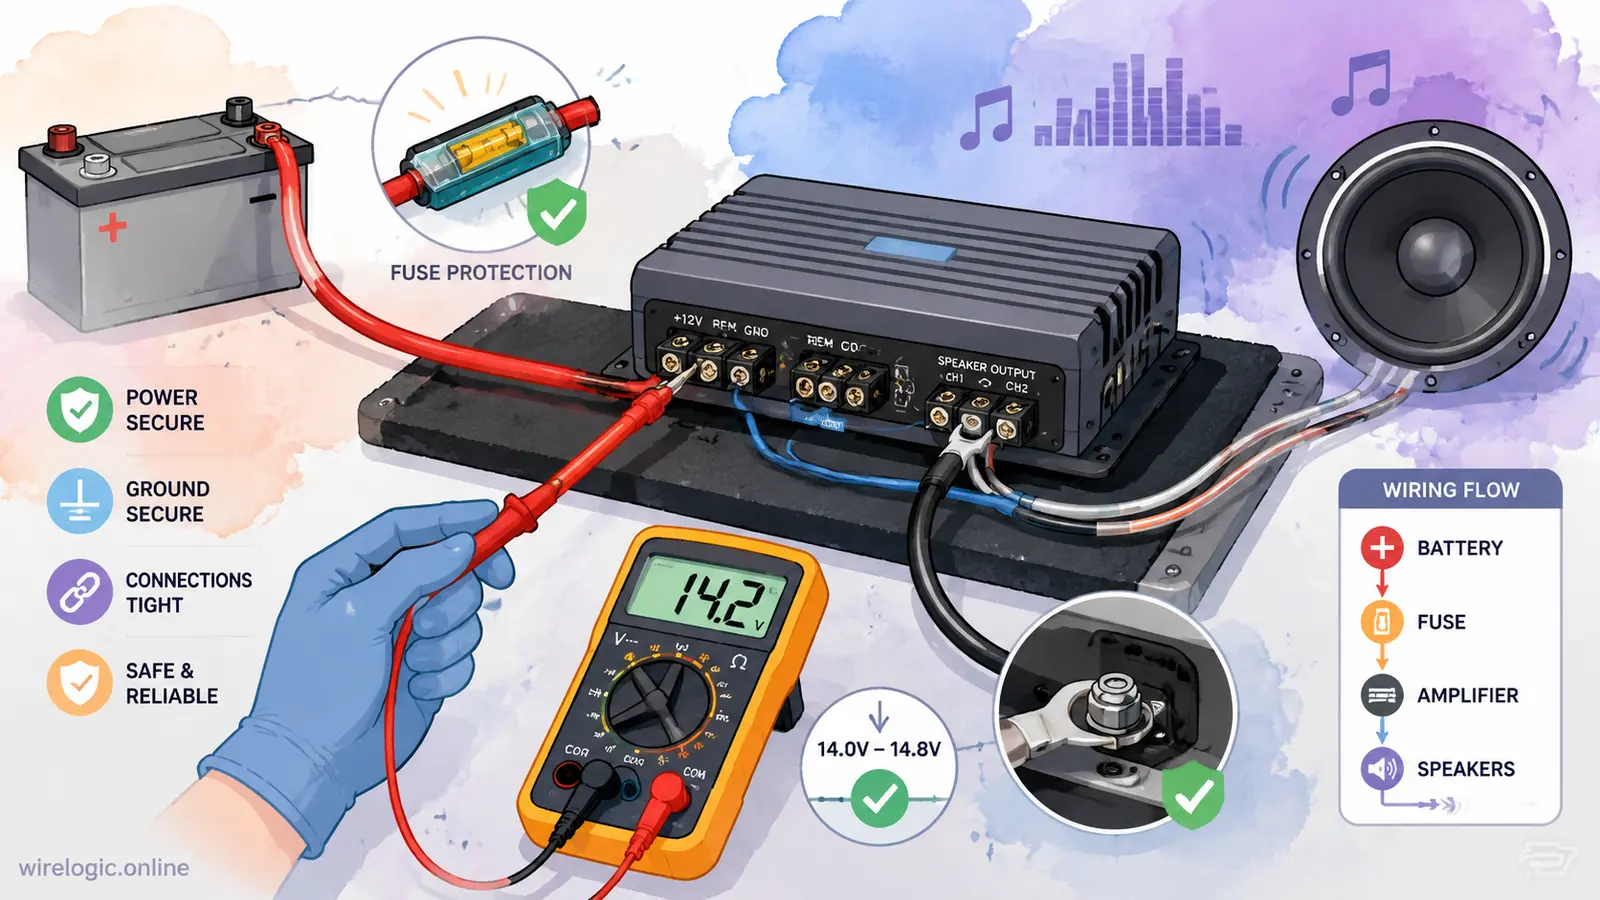
Testing the Setup Before Final Installation
Checking Voltage and Connections
Before securing panels and finishing installation, test every connection thoroughly. This step separates reliable systems from future headaches.
Start by checking battery voltage with the vehicle off and running. Then verify voltage at the amplifier terminals. Large voltage drops may indicate wiring resistance problems or poor grounds.
Inspect every connection physically. Tug lightly on terminals to ensure they’re secure. Loose connections create intermittent behavior that becomes frustrating to diagnose later.
Pay attention to amplifier startup behavior too. The amp should power on smoothly without loud pops, clicks, or protection mode warnings. If unusual behavior appears, stop and diagnose before proceeding further.
Signs Your Amp Setup Is Safe
A safe amplifier setup behaves consistently and predictably. The amplifier should:
- Turn on only when intended
- Shut off properly with vehicle power loss
- Maintain stable voltage
- Avoid excessive heat
- Produce clean sound without distortion
Drive the vehicle and test under real conditions. Vibrations, temperature changes, and charging system fluctuations may reveal hidden issues not visible during stationary testing.
Professional installers often monitor voltage during heavy bass playback to confirm charging system stability. Significant voltage sag may indicate the need for upgraded battery or alternator support.
Taking extra time during testing protects both your equipment investment and your vehicle’s electrical system.
Conclusion
Learning how to turn on an amp without a remote wire opens up several practical installation options, especially when dealing with factory stereos, custom builds, or older vehicles. The key is understanding that the remote wire exists for an important reason: controlled amplifier activation. Ignoring that purpose completely can create battery drain, overheating, and long-term electrical issues.
Using ignition-switched power remains one of the safest alternatives because it allows the amplifier to follow the vehicle’s normal power cycle automatically. Manual toggle switches also work well when installed responsibly, giving drivers direct control over amplifier operation. What matters most is ensuring the amplifier never stays powered continuously without intention.
Proper grounding, fuse protection, and wire sizing are just as important as the turn-on method itself. Even the best amplifier can fail quickly if wiring quality is poor or safety measures are ignored. Clean installation practices, careful testing, and thoughtful power management create reliable systems that perform well for years.
Car audio installations are a little like building a strong foundation for a house. If the electrical groundwork is solid, everything else works smoothly. Take shortcuts, and problems eventually appear. A properly wired amplifier doesn’t just sound better; it lasts longer, operates safer, and gives you confidence every time you turn the key.
FAQs
1. Can I connect the amp remote wire directly to the battery?
Yes, but it is not recommended. Doing so keeps the amplifier on constantly, which can drain the battery and reduce amplifier lifespan.
2. What happens if the remote wire is not connected?
Most amplifiers simply will not turn on because they require a trigger signal to activate internal circuitry.
3. Is using a toggle switch safe for amplifier control?
Yes, a properly installed automotive-grade toggle switch can safely control amplifier activation if you remember to switch it off when leaving the vehicle.
4. Can I use the cigarette lighter fuse as a remote source?
In many vehicles, yes. If the cigarette lighter circuit is ignition-switched, it can serve as a suitable amplifier trigger source.
5. Why does my amplifier stay on after the car is turned off?
This usually happens because the amp is connected to constant power or a delayed accessory circuit instead of a proper switched ignition source.

Nico Hartwell is a 26-year-old American content creator living in Spokane, Washington. He has developed expertise in software, productivity, and emerging technology through years of independent research and professional writing. As a writer for wirelogic.online, Nico creates informative, balanced articles designed to help readers make confident decisions using accurate, well-organized information.